Getting Your Bay Area Property Ready for an EV Charger
Start With Your Property Layout
Before any work begins, take a close look at your property. The layout of your home or commercial building will determine how straightforward the installation is. Walk around the outside of your building and note where your electrical panel sits. Is it on the side of the house facing the driveway, or is it tucked away in a garage or basement? The distance between the panel and where you want the charger will shape the entire project. A short, straight run keeps costs lower and work simpler. A long route that goes through finished walls, under concrete, or across a yard adds complexity.
Think about where you park. For a home charger, the ideal spot is close to where the car sits overnight. For a commercial property, you might need multiple units near parking spaces. Consider the path a cable would take from the panel to the charger location. This is the conduit route, and it matters a lot. If you have a finished garage with drywall on all sides, running a new circuit will involve cutting and patching. If the panel is in an unfinished basement and the charger goes on an exterior wall, the work might be simpler. Knowing your property's specifics helps you plan ahead.
Check Your Electrical Panel Capacity
Your electrical panel is the heart of the system. It distributes power to every circuit in the building. Adding an EV charger means adding a new, high-power circuit, typically 40 to 60 amps. That is a big draw. Look at the main breaker rating on your panel. A typical home might have a 100, 150, or 200 amp service. If your panel is already near its limit from running air conditioning, electric heat, an electric oven, and other large appliances, adding a charger could overload it.
Signs that your panel might be tight include frequent breaker trips or a panel that feels warm. But even if nothing seems wrong, the math matters. A licensed electrician can calculate the existing load and tell you whether there is room. If there is not, you have options. You might install a load management device that shares power between the charger and other appliances, or you might upgrade the panel to a higher capacity. Panel upgrades are a bigger job and often require coordination with your utility company. But they also future-proof your home for other electric upgrades down the road.
For commercial properties, the situation is similar but often involves three-phase power and larger loads. A professional assessment is essential. Do not guess. An electrician will open the panel, measure wire sizes, and check the main breaker. They will also verify that the panel itself is in good condition. Older panels, especially those with known safety issues, may need replacement before any new circuit can be added.
Understand Permit and Inspection Requirements
In the Bay Area, electrical work generally requires a permit. This is not optional. Permits ensure that the installation meets local codes and is safe. The process varies by city. San Jose, for example, has its own building department with specific rules. Other cities in the Bay Area have their own requirements. Some municipalities offer expedited permits for EV chargers because they want to encourage adoption. Others have standard timelines that can take a week or more.
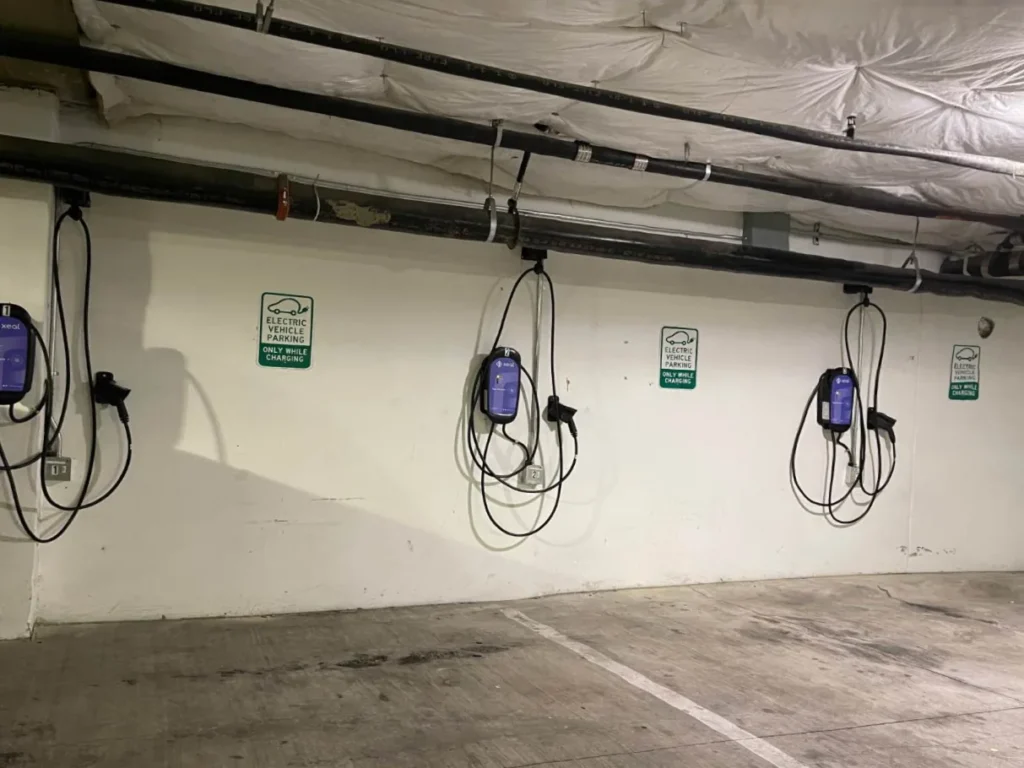
Your electrician typically handles the permit application. They submit plans showing the charger location, wire sizes, conduit routing, and breaker details. Once the permit is issued, the work can begin. After installation, a city inspector visits to verify everything is correct. They check that the conduit is properly supported, the connections are tight, and the charger is grounded. They also confirm that the circuit breaker is the right size for the wire. Passing inspection is the final step before you can use the charger.
Skipping the permit might save time now, but it creates problems later. Unpermitted work can surface during a home sale inspection, causing delays or requiring costly fixes. Insurance companies may also deny claims if they find unpermitted electrical work. So while the permit process feels bureaucratic, it protects you and your property.
Plan the Conduit Route and Charger Location
Once you know where the panel is and where the charger should go, plan the physical path for the wires. Conduit protects the wires from damage and moisture. It can be run inside walls, along the surface of a wall, underground, or overhead. The best route depends on your building's construction. For a garage with exposed studs, surface-mounted conduit is simple and inexpensive. For a finished garage, running conduit inside the wall keeps things tidy but requires cutting and patching drywall.
If the charger goes outside, the conduit must be rated for wet locations. That usually means rigid metal conduit or a specific type of PVC. The charger itself must also be rated for outdoor use. Many modern chargers are weatherproof, but double-check the product specifications. The location should be convenient for plugging in but also protected from direct rain and snow if possible. Mounting the charger on a wall or a pedestal keeps it off the ground and away from potential damage.
For underground runs, trenching is required. The depth of the trench depends on local codes, usually 18 to 24 inches. This is a labor-intensive step but necessary if the panel and parking area are far apart. Mark any existing underground utilities before digging. Call 811 or your local utility location service to have lines marked. Hitting a gas line or data cable is dangerous and expensive.
Coordinate With Your Utility Company
Adding a high-power circuit may require a utility connection upgrade. Your utility company manages the service drop that brings power to your building. If your panel upgrade requires a larger service, the utility must approve and install the new connection. This can take weeks or months, so start early. Contact your utility to ask about their process for EV charger installations. Some offer rebates or time-of-use rates that make charging cheaper overnight.

In some cases, the utility may require a separate meter for the charger. This is more common for commercial properties but can happen for homes with very high loads. A separate meter allows the utility to track charging separately, which can qualify you for special rates. Your electrician can advise on whether this makes sense for your situation.
Get a Professional Installation Assessment
Before committing to a specific charger model, have an electrician perform an installation assessment. They will visit your property, inspect the panel, measure distances, and evaluate the route. They will also check for any existing code violations that need fixing first. This assessment gives you a clear picture of what the project involves, including the likely timeline and any surprises. It is the step where you learn whether you need a panel upgrade, trenching, or a complex conduit run.
A good electrician will also help you choose the right charger. They can explain the difference between hardwired and plug-in models, the importance of amperage, and whether you need features like Wi-Fi connectivity or load sharing. They will also ensure the charger you pick is compatible with your vehicle and your electrical system. For property owners in the Bay Area, working with a local company that knows the permitting process and utility requirements can save a lot of headaches. Wooding Electric provides this type of assessment and installation for home and commercial EV chargers, dedicated circuits, and related electrical infrastructure in San Jose and the surrounding area.
Prepare the Site Before Installation Day
Once you have a plan and a permit, prepare the area. Clear the path from the panel to the charger location. Move vehicles, storage boxes, and anything else that might block access. If the electrician needs to cut drywall, cover nearby furniture with plastic sheeting. For outdoor work, ensure the ground is accessible and not obstructed by landscaping or debris. If trenching is involved, mark the route clearly so the crew knows where to dig.
Talk to your electrician about the expected timeline. A straightforward installation might take a few hours. A complex one involving a panel upgrade and trenching could take a full day or more. Plan accordingly. If you have pets, keep them away from the work area. Electrical work involves tools, open panels, and exposed wires, all of which can be dangerous for curious animals.
What to Watch for After Installation
After the charger is installed and inspected, test it. Plug in your vehicle and confirm it starts charging. Check that the charger's indicator lights show normal operation. Listen for unusual buzzing or clicking sounds from the panel or charger. A slight hum from the transformer is normal, but anything loud or intermittent warrants a call to the electrician. Also, verify that the charger does not get excessively hot during use. Warm is normal; hot to the touch is not.

Keep the permit and inspection paperwork. You will need it if you sell the property or if you ever have an insurance claim. Some utilities also require proof of installation for rebate programs. Store the documents in a safe place. Over time, check the charger and its connections for signs of wear, corrosion, or damage. Outdoor chargers face sun, rain, and temperature swings. A quick visual inspection every few months keeps everything safe.
Preparing a Bay Area property for an EV charger is a project that rewards careful planning. Start with your layout, understand your panel, get the right permits, and work with a qualified electrician. Each step builds on the last, and skipping any one can lead to delays or safety issues. By taking it methodically, you end up with a charger that works reliably for years. Whether you are a homeowner or a commercial property manager, the process is the same: assess, plan, permit, install, and inspect. And if you need help along the way, companies like Wooding Electric specialize in the electrical side of the job, making the whole process smoother.